
I always hear people saying that hiking season ends in the fall and then begins again in the Spring. I used to follow that rule too until I finally realized winter hiking/snowshoeing is just as fun! Why does it need to end because the weather just got colder and snowy? Some of you may say, “Well I get too cold” or “I hate hiking in the rain/snow” or maybe you already are a winter hiking lover and I don’t even need to convince you.
With the right winter hiking essentials you can enjoy the benefits of hiking in the winter while staying warm and dry. My favourite benefits are the fresh air, no bugs, and the beauty of being surrounded by snow-capped mountains. Your inner child loves playing in the snow so get out there and go play in the snow!
This post is obviously geared more towards beginners but also serves as a reminder of items you may need to update or may want to add. NOTE: Layering will depend on the temperature outside and for your own comfort level. Follow the basic rules listed below and adapt to how many layers you end up needing. Sometimes you can find products that serve multiple purposes. The winter hiking essentials below will include some clickable examples of what I think are some good options to go with (men and women examples). So let’s get to it.
Winter Hiking Essentials
Clothing Layers
Step 1: Base layers
Your first layer needs to be a breathable synthetic moisture-wicking and body temperature regulating layer. Think of this layer as your second skin. You need it to be moisture-wicking because you still are going to sweat when you are hiking in the winter. Do not wear cotton as a base layer. Cotton is not breathable and not moisture-wicking so you will end up freezing at the top when you have finally stopped hiking to have lunch. Even your undergarments should be synthetic.
Suggested clothing items
LINER SOCKS

Icebreaker Men’s Hike Liner Crew Socks
SHIRT

Helly Hansen Men’s Lifa Active Long Sleeve…
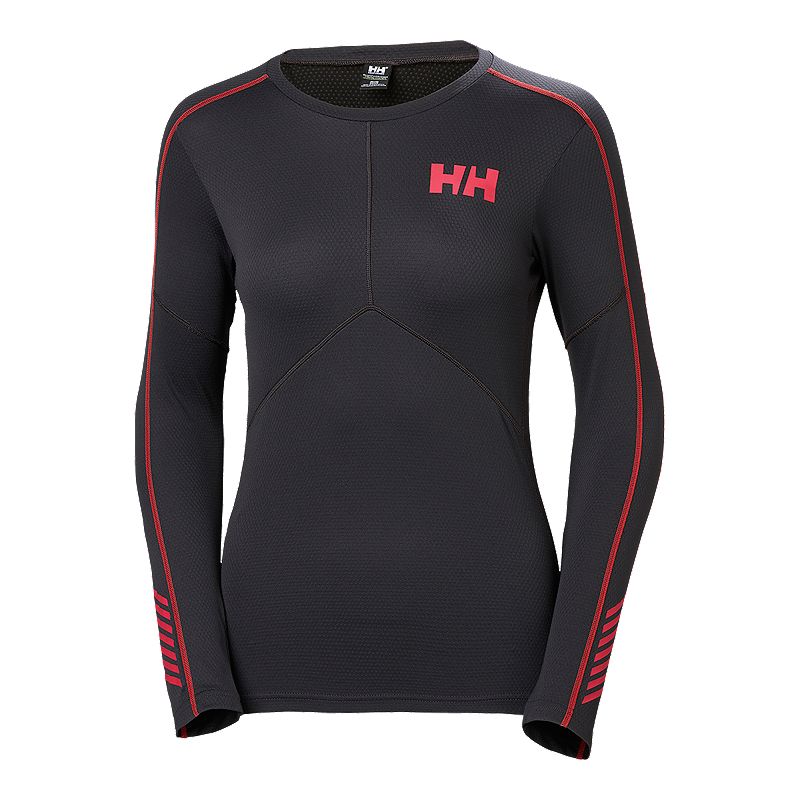
Helly Hansen Women’s Lifa Active Crew
PANTS


Helly Hansen Women’s Lifa Active Pants
Step 2: Insulating Layers
Your next layers need to be insulating layers. You need clothing with a material that is designed to trap your body heat in so you stay warm. Choose clothing made of wool, down or fleece. If you are anything like me you will be throwing these layers in your back pack halfway through the hike (or sooner) but as soon as you stop you will definitely need to put them back on.
Suggested clothing items
THICK INSULATING SOCKS
(Merino wool is a great option)

Icebreaker Men’s Hike Medium Crew Socks

Icebreaker Women’s Hike Medium Crew Socks
FLEECE PANTS

Mountain Hardwear Yumalino Stretch 32 Inch…
FLEECE SHIRT

The North Face Men’s Wakerly Hoodie – Dark…

McKINLEY Women’s Rubin Fleece Knit Jacket …
DOWN JACKET

Mountain Hardwear Men’s Nitrous Down Jacket

Pajar Women’s Jenna Down Jacket
THICK WARM GLOVES
TOQUE

Arc’teryx Rho Light Weight Men’s Beanie

Arc’teryx Women’s Waffle Toque
NECK WARMER
Step 3: Outer Layer
Now that your nice and warm you need to protect these layers with a WATERPROOF outer shell and WATERPROOF boots; especially in BC when the weather is unpredictable. There is nothing worse than being out in the freezing temperatures and being wet, it is not only uncomfortable it is dangerous, especially if you will be outside for longer than a couple of hours.
Suggested clothing items
JACKET
(Gore-tex material is highly recommended)

Arc’teryx Men’s Beta AR Gore-Tex Jacket – …

Mountain Hardwear Women’s Exposure/2â„¢ GO…
HIKING BOOTS

Salomon Women’s X Ultra 3 Mid Gore-Tex Hik…

The North Face Men’s Hedgehog Fastpack Mid…

Columbia Women’s Evolution Valleyâ„¢ Pants

The North Face Men’s Venture 2 Half Zip Sh…
GLOVES
GAITERS
Let me just talk about Gaiters for a second because I finally got them and they are one of my new favourite winter hiking essentials. Gaiters stop all that snow from getting inside your shoe from the top and they are also good for those muddy rainy day hikes. They hook on to the bottom of your shoe and completely cover the opening of the shoe. Another recommendation is to get Gore-tex socks, especially if you currently do have waterproof boots that may be lacking in the waterproofing department due to wear and tear.
Hiking Gear
Next up for winter hiking essentials is the gear!
Microspikes/Crampons
These are definitely essential to winter hiking! Many of the snowshoe trail in Vancouver, BC area are well used so the snow on the trails become hard-packed which makes it microspike friendly! It is definitely easier to hike with microspikes on than snowshoes. Even if you do not think you are hiking up a snowy trail in the winter, you can still hit unexpected patches of ice or snow near the top.
Microspikes are not going to take up much space in your pack. Get a separate little bag to store them in (if yours does not come with one already) and that way you do not have to worry about them snagging anything or getting the rest of your stuff in your pack dirty.
Some added tips are to make sure they are the ones with the pointed “teeth” (shown in the link provided). I do not recommend the coiled crampons as they do not seem to stay on the shoe as well and they do not stick into the ice as well (they are cheaper because they do not work as well).
Hiking Poles
Hiking Poles are great for year-round hiking for added stability and to take some pressure of the knees/legs. They are really handy for snow-shoeing as well. Make sure you have snow-baskets on the ends of your poles for snowshoeing so your poles do not sink into the snow. They are also really handy for testing out the stability of the trail in front of you.
Snowshoes
Snowshoes are necessary when you are hiking in areas with deep and soft snow. They are designed to keep you on top of the snow and prevent you from sinking into the snow (aka “post-holing”). Often there are hikes that are better off starting with microspikes but then switching to snowshoes near the top. Although some areas like Manning Park or Mt. Baker that have a ton of new snow everyday will require snowshoes the whole time. Know where you are going and if you are unsure then bring both microspikes and snowshoes.
Something to keep in mind when buying snowshoes is to make sure the snow shoes come with the heel-lift feature. If you only plan to do flat snowshoes than you do not have to get snowshoes with a heal lift. The heal lift is necessary for going uphill. Another great added feature is when the snowshoes have grips on the bottom; this is very helpful for trekking through deep frozen snow. The good news is you can also rent snowshoes at multiple locations if you do not wish to buy. At MEC you can rent both regular snowshoes (for flat snowshoeing) and performance snowshoes (which have all the added features I mentioned).
Other Considerations
Backpack: A good-sized day pack to keep extra layers in.
Sunglasses: The snow is almost blinding when the sun hits it.
Finally
Be sure to check avalanche conditions before heading out on the back-country trails in the winter. Daily updates are posted on Avalanche Canada. Be aware if the trail you plan to snowshoe crosses avalanche zones. It is highly recommended to have Avalanche Safety training and/or travel with those who are trained and have the necessary safety gear. Also highly recommended to snowshoe when avalanche risk is low.
For more information on safety and about Avalanche Safety training check out the AdventureSmart website.
Have fun and be safe!
Do you have any other recommendations? Leave them in the comments below!
DISCLOSURE: This post contains affiliate links. If you make a purchase by clicking on the photo links I may receive a small commission. This does not cost you any additional money but does help to keep the website up and running! Thank you!


It’s hard to find well-informed people about this topic, however, you sound like
you know what you’re talking about! Thanks http://www.Fourkrestaurant.com/
Thank you very much!